Definition
Service Level Agreement (SLA) (ITIL v3): [Service Design] [Continual
Service Improve] An agreement between an IT Service Provider and a Customer. SLA describes the IT service, documenting objectives, and specifies the responsibilities of the IT service provider and the customer. A single SLA can cover multiple IT services or more customers.
The intention of service level is to maintain and gradually improve the quality of services through follow-up, reporting and evaluation services, and to take action to eliminate unacceptable service levels.
Here you can set up SLAs with service levels and opening hours to calculate "Start within" or "Resolved within" for case. These can be linked to object type, object, categories and priority, etc. It can also be linked to an SL document with details about the agreement.
«Start within» is defined differently depending on how the case is registered.
- If it is received from email or user web, it measures the time from received to registered.
- If the case is manually registered by a agent, it measures the time from received to started.
In More Service
Under Servicedesk Admin Service Level, you have the option to set up
Service Level Agreements (SLA):
SLAs can be established based on:
- Customer group
- Priority
- Category
- Case type
In the SLA module, you have the following overview:
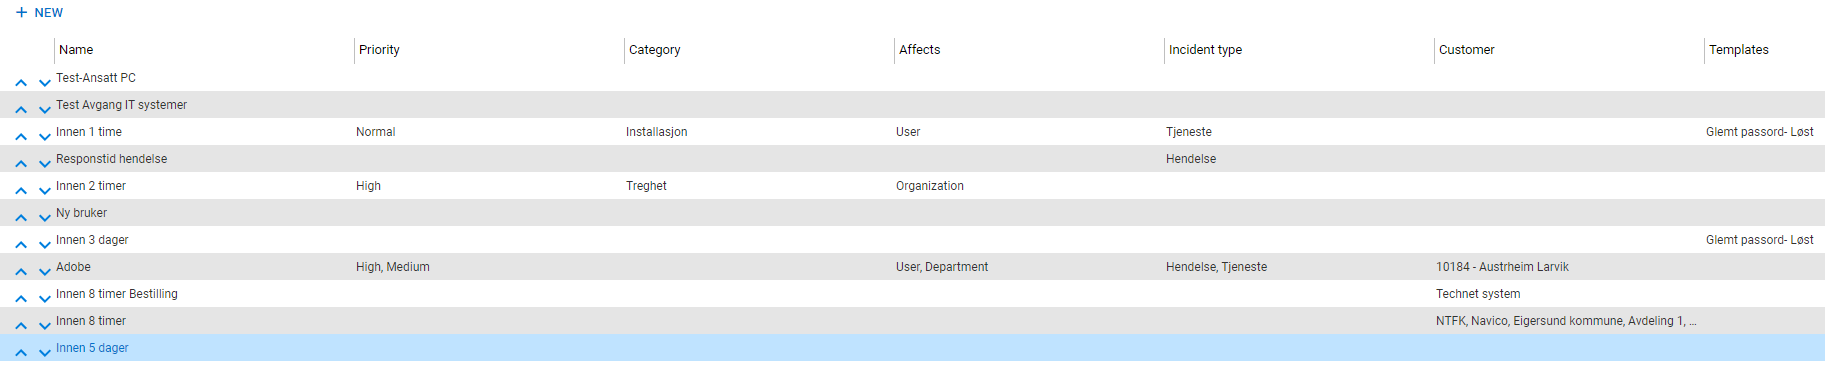
Here are all the agreements that applies to your database.
The SLA view consists of a table showing the name of the agreement (SLA), also shown in Servicedesk overview.
The table shows the criteria that must be met for each agreement.
The table consists of the columns «Name», «Priority», «Category», «Affects», «Incident Type», «Customer», and «Templates».
The SLA agreements are arranged in the order you wish them to activate. The SLA agreement that is arranged at the top of the table activates first. The sorting is done with arrows up and down to the left in the view.

An SLA is created by clicking +New to the left and above the columns.
Place the cursor in the box where it says "Enter SLA name" for the SLA agreement.
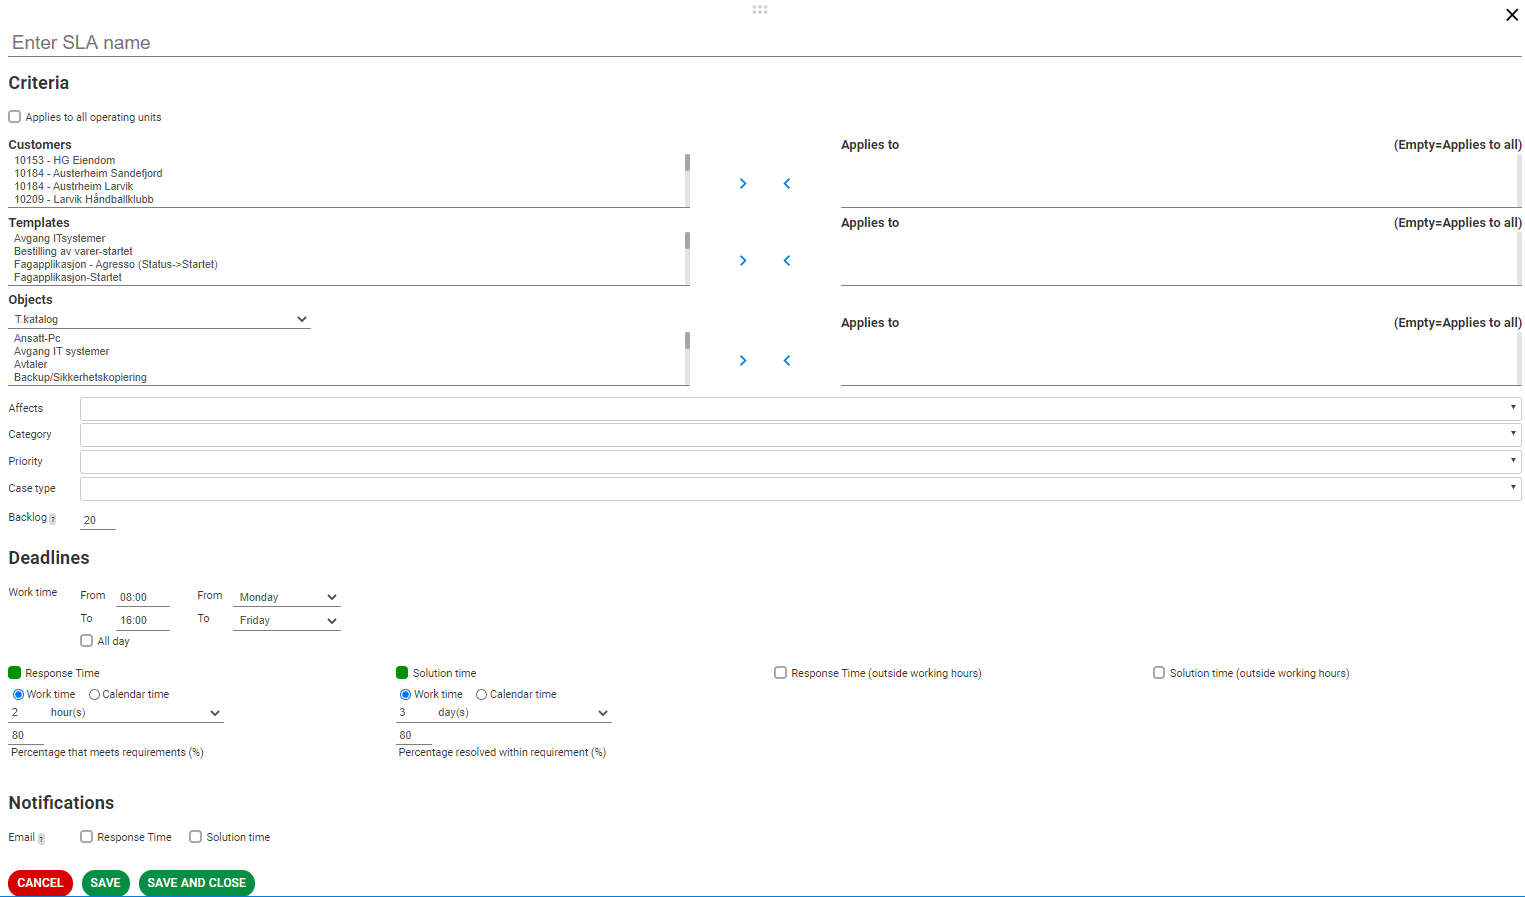
Then select "Criteria":
Should this agreement apply to all operational organization units in your database? If so, check 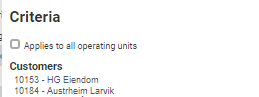
If the agreement is only applicable to your operational organization unit, you do NOT check it.
Then choose the customer(s) the SLA should apply to.
Mark the customer and click ![]() so that the customer is moved to the right side as shown below.
so that the customer is moved to the right side as shown below.
You can choose multiple customers.
![]()
If this response SLA agreement applies to a template you have created, you can choose to add it in the same way as above. Shown below.
![]()
Next possibility is to connect one or more object with the SLA agreement.
NB! «One object on the case meets the criteria»

Under Object you will find all the objects in the Service Map (CMDB). Select object type first, then the objects will appear under the object type you have selected. Select the object that is relevant. Click the arrow keys so the objects move to the right side.

The SLA can also be linked to a template as an additional criteria.
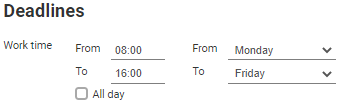
Deadlines
See below how this could be set up. Which business hours should the SLA agreement apply to. By default, business hours are set between 08:00 and 16:00. If you change business hours to time from 00:00 to 00:00, the SLA will start running whenever the case is registered.

Work time
With business hours from 08:00 to 16:00, SLA will run only during these hours.
Business hours are valid for Monday to Friday. All Norwegian holidays are excluded. Christmas, Easter, May 17th, unless otherwise is stated.
In the example above, it is important that the agent starts working with the case and makes a work log before 2 hours have passed within work time.
Calendar time
If you use Calendar Time, this will overwrite all work time and holidays.
SLA fulfillment
"Percentage that meets requirements (%)» can be changed. ![]() .If more than 80% of the cases are started within the required response time, the SLA is considered met. If not meeting the SLA, the SLA report will be marked.
.If more than 80% of the cases are started within the required response time, the SLA is considered met. If not meeting the SLA, the SLA report will be marked.
SLA for solution time
It is also possible to define SLA for solution time, within business hours or calendar time.
Works as mentioned above.
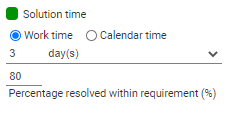
For all cases with this SLA, the proportion of cases solved within the requirement must be at least 80%.
If you check of for the «Whole day», "business hours will be considered as 00:00 to 00:00
SLA will start running from the time case being created. If it is set at 2:00 PM, SLA will start from 2:00 PM.
If you create more SLA per customer group or item, it is important that you prioritise SLA at the top of the list correctly according to which SLA should be prioritised first.
Notifications
For SLAs you can choose whether the agent should receive an email notification 3 hours before the response time or solution time expires.
If response time or resolution time is not met, Servicedesk Manager will receive an email when the time has expired.
Save and close SLA by clicking the cross in the top right corner.
Sorting is done by clicking the arrow keys (in the left column) up or down to prioritise SLAs correctly. It is important that you test the SLA after you have created it.
Some prerequisites for start time in SLA:
"Start within" is defined differently depending on the type of registration of the case.
- If it is received from email or user web, it meassures the time from "received" to "registered".
- If the case is manually registered by an agent, it meassures the time from "received" to "started".
SLA in Service desk view
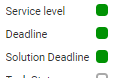
The Servicedesk view allows you to add the columns:
SLA= Name of the SLA agreement
Solution deadline = solution time
Started within = response time
This is done from the icon located to the left in the column line![]()
Remember that the above chosen columns are not included in the Default setup so you must save this setup.
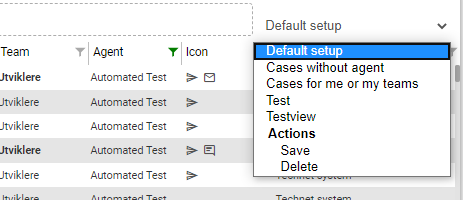
Click drop down menu and select «Save».
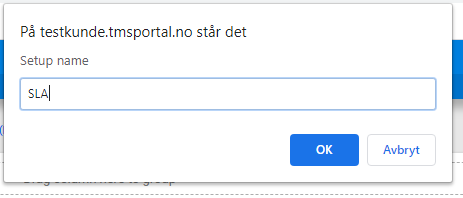
This dialog box appears. Enter setup name and click OK.
You have saved this view.
SLAs are shown in the Servicedesk view.

It is recommended to test the SLAs thoroughly in the test database before taking it into production.