With the button on the left side, you can specify which columns you want to see in the overview. ![]()
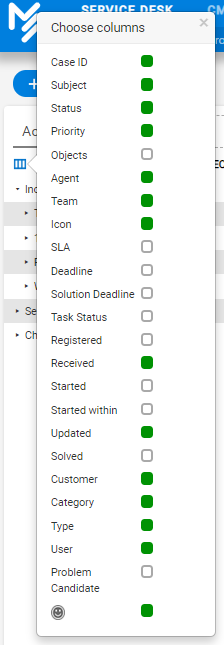
Case ID: Each case is automatically assigned a unique ID number upon registration. This is the case's identification number.
Subject: The subject registered on the case will be visible in the case list.
Status: Case status.
Priority: Here you will see the color code for the priority selected for the case. Color codes for the priorities can be chosen in admin tab.
Objects: All objects in the case are displayed.
Agent: Agent assigned to the case.
Icon: Read more about icons in the chapter "Icons in the case list".
Deadline: If an SLA has been assigned to the case, the completion date will be shown in case in accordance with the chosen SLA. For normal Incident it will usually be a start-within-SLA. For service and access it would normally be a resolved within SLA. Cases are by default sorted according to deadline when entering the overview. When the time limit is about to expire, the color Access. When that deadline has elapsed, an ALARM will appear.
Task Status: This field shows the number of subtasks a case has and how many of the subtasks have been solved. By hovering the mouse over the number, you can see the subject, agent and status of the subtasks on the case.
Registered: Date and time for when the case was registered, or the case was retrieved from the inbox and assigned an agent.
Received: Date and time when the case came in to inbox, received as a web case, or received as an email.
Started: The time the case was actually started.
Updated: Date and time for when the case was last saved / changed.
Resolved: Date and time for when the case got status «Solved» / «Remaining unresolved».
Customer: Name of the user group.
Category: Category of the case
Type: The icon for which case type the case is. According to ITIL, the case types are defined as Incident, Access, Service, Problem, and Change.
User: User who has submitted the case.
Problem candidate: A case can now be labeled as a problem candidate, see options under the "Extra" tabcase. You can choose to display information about this in the Servicedesk overview, by selecting to display the "Problem candidate" column.
Overview
Content Tools